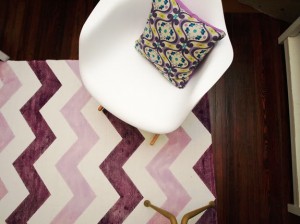
When creative impulses strike, it seems ideas are bound to be stopped by a lack of funds, but Murray State students have learned to be resourceful and have embraced the do-it-yourself trend. Within the DIY fad, many have found decorations, furniture, clothes and patterns to love, spotlighting the newfound objects as the craze of the moment.
One such newcomer is the large, chunky zigzag pattern, or chevron, that is all over every DIY blog, fashion accessory, Pinterest profile and household decoration. Characterized by thick, even zigzag stripes in alternating colors, the pattern has shown itself to be versatile, easy to make and attractive, quickly bringing itself to the forefront of fashion and decor.
Chevron has recently made appearances on Murray State’s campus.
“Chevron is the modern stripe, and the best thing to happen to fashion design,” said Natalie Guerreiro, sophomore from Souderton, Pa. “I like to chevron everything. I love it.”
One such DIY chevron decor example is the idea of creating one’s own inexpensive DIY chevron area rug. Made using simple, easily obtainable supplies, the project allows students to custom create a chevron rug in whatever colors or size they want. The project also boasts a cost of less than $50 for a 5’x7’ customized rug.
What you need
– IKEA ERSLEV flat woven rug, white
– standard painter’s tape
– standard paint wall brush
– Latex paint in one or two colors
How to make it
1. Lay the rug down, spreading out all edges and removing any creases without allowing the fabric to curl.
2. Outline where the chevron stripes will be using painter’s tape.
3. Begin painting within the first outlined chevron and start to work the paint color into the grooves of the carpet. Covering each fiber with paint while avoiding extra paint buildup, as it won’t be absorbed by the rug, and will cause the rug to flake and bleed color.
4. Skipping the next chevron, as it will remain white, continue to work the color into every other section until the end of the rug has been reached.
5. Do not remove the painter’s tape. It is very important to allow the rug to dry with the tape still on the rug to ensure no paint will bleed color where it should not. Allow the rug to dry completely for 1-3 days, removing the painter’s tape only when the rug is 100 percent dry.
Story by Shannon MacAllister, Staff writer.